1. What is a Kuksa cup?
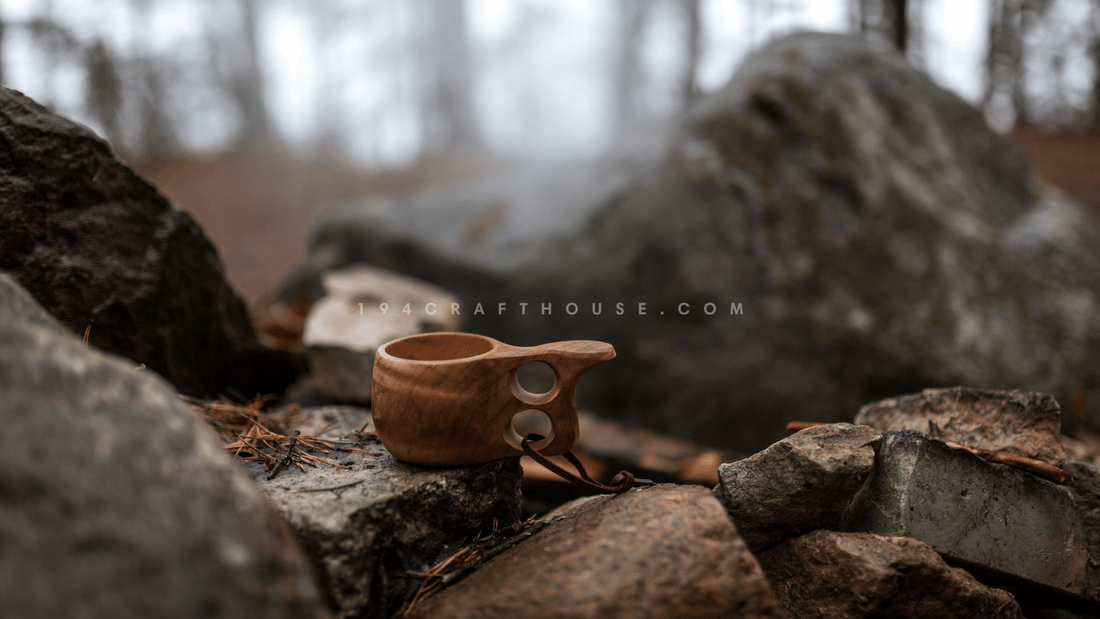
A Kuksa cup is a traditional wooden drinking cup originating from the Sami culture in northern Scandinavia.
Made from a single piece of wood, typically birch burl or hardwood, each Kuksa is unique in shape and markings due to its handmade nature.
Originally used by the Sami people during their nomadic lifestyle for hunting, fishing, and outdoor tasks, the Kuksa is renowned for its durability and ability to withstand harsh conditions.

Beyond its functionality, the Kuksa holds cultural and symbolic significance, symbolizing a connection to ancestral traditions and a close relationship with nature for the Sami.
Today, Kuksa cups have gained popularity among outdoor enthusiasts and those interested in traditional craftsmanship and eco-friendly products.
The wooden material is believed to enhance the taste of beverages, making it particularly favored for drinking coffee or tea in the wilderness.
With its rich history and international recognition, the Kuksa has evolved into various designs and decorations, appealing to a broader audience while retaining its roots in Sami culture.
2. Kuksa cup history and cultural significance.
The history and cultural significance of the Kuksa cup are deeply rooted in the traditions of the indigenous Sami people of northern Scandinavia, specifically in the regions of Sweden, Norway, Finland, and parts of Russia.
The Sami, also known as the Sámi or Lapp people, have been the inhabitants of Sámi for thousands of years, leading a nomadic lifestyle as hunters, gatherers, and herders of reindeer.
The Kuksa cup has served as an essential and practical tool for the Sami people throughout their history.
Traditionally, these cups were carved from a single piece of wood, often birch burl or other hardwoods, and shaped into a functional vessel for drinking and carrying liquids.
Due to their craftsmanship and the use of natural materials, each Kuksa cup is unique, bearing the marks of the artisan who created it.
 A Sámi family in Norway around 1900 - Wikipedia
The cultural significance of the Kuksa cup lies in its representation of the Sami's deep connection to nature and their reverence for the environment.
As a people whose lives are closely intertwined with the wilderness, the Kuksa embodies their respect for the natural world and serves as a symbol of their ancestral heritage.
The process of creating a Kuksa cup is considered an art form and is passed down through generations within the Sami community.
The carving of a Kuksa requires a deep understanding of the wood's properties and the traditional techniques used to shape the cup.
This craftsmanship is not only a practical skill but also an expression of cultural identity and artistic expression.
Beyond its functional role, the Kuksa cup holds spiritual significance for the Sami people. It is believed that the spirit of the forest, known as the "luonto," resides within the wood, infusing the cup with a sacred connection to nature. As such, the Kuksa is treated with great respect, and certain customs are observed when using and caring for it.
Traditionally, a new Kuksa cup is consecrated through a ritual involving offerings and a prayer to the spirits of nature. Sami shamans and spiritual leaders have played a vital role in these ceremonies, further highlighting the spiritual dimension of the Kuksa cup within Sami culture.
3. Kuksa cup designs and patterns.
Kuksa cups come in a wide variety of designs and patterns, reflecting the creativity and artistic expression of their makers.
While the traditional Kuksa design is simple and functional, modern variations have evolved to cater to different tastes and preferences.
Here are some common Kuksa cup designs and patterns:
- Natural and Rustic: Many Kuksa cups feature a natural and rustic design that showcases the wood's grain patterns and natural imperfections. These cups often have a rough or unfinished exterior, highlighting the organic beauty of the material.

- Smooth and Polished: Some Kuksa cups are meticulously sanded and polished to create a smooth and refined surface. This design accentuates the wood's colors and grain, resulting in an elegant and sophisticated appearance.

- Carved Patterns: Artisans may incorporate intricate carvings and etchings on the Kuksa's exterior. These patterns can range from traditional Sami symbols and wildlife motifs to geometric or abstract designs.

- Embellishments: Kuksa cups can be adorned with various embellishments, such as leather straps, beads, feathers, or antler attachments, adding a touch of uniqueness and individuality to each cup.

- Personalized Kuksa Cup: Some Kuksa cups feature personalized engravings, such as names, dates, or meaningful quotes. These customizations make the cups meaningful gifts and cherished keepsakes.

- Two-tone or Multi-wood Designs: Craftsmen may combine different types of wood to create striking two-tone or multi-wood designs. This technique allows for contrasting colors and textures, enhancing the visual appeal of the cup.

- Colored Stains: In some cases, artisans may apply colored stains or natural dyes to the Kuksa cup, adding subtle hues or vibrant colors to the wood's surface while still preserving its natural appearance.
- Lid and Handle Designs: Some Kuksa cups feature lids and handles carved from the same piece of wood or attached using leather straps. These additions not only add practicality but also contribute to the cup's overall aesthetic.
- Contemporary Designs: Modern Kuksa cups may deviate from traditional shapes and patterns, incorporating contemporary design elements and unconventional forms, attracting a broader audience.
- Artistic and Unique: Artists and skilled craftsmen often create one-of-a-kind Kuksa cups with extraordinary designs, using their creativity to produce functional works of art.

It's important to note that while these designs and patterns enhance the beauty of Kuksa cups, their cultural significance remains paramount.
When purchasing a Kuksa cup, respecting its traditional roots and the craftsmanship involved ensures the preservation of its historical and cultural value.
Whether traditional or contemporary in design, a Kuksa cup represents a tangible connection to nature, tradition, and the enduring spirit of the Sami people.
4. What is the Kuksa mug used for?
Many people often wonder if they can drink coffee in a Kuksa cup?
The Kuksa offers an exceptionally pleasant drinking experience.
It's never too hot to hold or drink from and you can tune its flavor to your own taste.
Once you've gotten cozy with your Kuksa, it might just become the last cup you want to drink from.
Each time you drink coffee from a Kuksa, it's infused by the oils and tannins in your coffee. This keeps the Kuksa clean without washing.

The Kuksa mug, it has been an essential part of the indigenous Sami culture and Scandinavian outdoor traditions for centuries.
Here are some of the primary uses of the Kuksa mug:
- Drinking hot beverages: One of the main purposes of a Kuksa cup is to enjoy hot beverages like coffee, tea, or hot chocolate. The wooden material is believed to add a subtle woody flavor to the drink, enhancing the overall experience.
- Cold beverages: While the Kuksa cup is commonly associated with hot drinks, it is also suitable for enjoying cold beverages such as water, juice, milk, or traditional Sami drinks like birch sap or lingonberry juice.
- Outdoor adventures: The Kuksa mug is a favorite among outdoor enthusiasts, including hikers, campers, and bushcrafters. Its durability and natural insulating properties make it well-suited for outdoor use.

- Cultural symbol: For the indigenous Sami people of Northern Europe, the Kuksa cup holds immense cultural significance. It represents a connection to nature, their nomadic way of life, and the traditions passed down through generations.
- Traditional use: Historically, the Kuksa cup was used by the Sami people during their reindeer herding and hunting trips. It provided a reliable and practical vessel for consuming beverages in the wilderness.
- Craftsmanship and art: Beyond its functional use, the Kuksa mug is admired for its handcrafted beauty and artistic value. Skilled artisans create unique designs and patterns, turning each Kuksa into a work of art.

- Gifts and souvenirs: Kuksa cups have become popular gifts and souvenirs for those interested in Scandinavian culture and outdoor activities. They hold sentimental value and are treasured by recipients.

- Connection to nature: Using a Kuksa cup made from natural wood allows individuals to feel a deeper connection to the environment and nature's resources.

- Camping and Bushcraft: For those practicing bushcraft skills and wilderness survival, the Kuksa mug serves as a functional and authentic tool for drinking and cooking.

- Teaching and Education: The Kuksa cup plays a role in cultural preservation and education, as it provides an opportunity to learn about the traditions and lifestyle of the Sami people and the historical significance of this unique drinking vessel.
Baptize your Kuksa like the Lapps
According to tradition, when you first use your kuksa, you have a little routine to follow:
- Pouring alcohol into your Kuksa.
- Turn it counter-clockwise.
- Take a sip of alcohol.
- Turn the alcohol in your Kuksa counterclockwise.
- Take another sip of alcohol.
- Warning: alcohol abuse is dangerous for your health.
5. Kuksa cups vs. other types of cups.
Kuksa cups offer unique features and advantages that set them apart from other types of cups. Here's a comparison of Kuksa cups with other common cup options:
- Material: Kuksa cups are made from natural wood, usually birch burl or hardwood, giving them a distinct and organic feel. In contrast, other cups are typically made from materials like glass, ceramic, stainless steel, or plastic.
- Aesthetics: Kuksa cups' natural wood grain and hand-carved designs make them visually appealing and unique. They exude a rustic and traditional charm that other cups may not possess.
- Taste: Many users believe that Kuksa cups enhance the taste of beverages, especially hot drinks like coffee and tea. The wooden material is thought to add a subtle woody flavor that complements the beverage, offering a different drinking experience from cups made of other materials.
- Sustainability: Kuksa cups are considered eco-friendly and sustainable since they are made from renewable materials. Unlike cups made of plastic or certain ceramics, they have a minimal environmental impact and can last for a long time with proper care.

- Durability: Kuksa cups are known for their durability and ability to withstand outdoor conditions. They are less prone to breaking compared to glass or ceramic cups, making them ideal for camping, hiking, and other outdoor activities.
- Insulation: Wooden Kuksa cups have natural insulating properties, helping to keep beverages warmer or cooler for longer periods compared to some other materials.
- Weight: Kuksa cups are generally lightweight, making them easy to carry and transport. This is particularly advantageous for outdoor enthusiasts who value lightweight gear.
- Handcrafted and unique: Each Kuksa cup is individually handcrafted, resulting in a unique and distinct design. Other cups, especially mass-produced ones, may lack the same level of individuality and craftsmanship.
- Cultural significance: Kuksa cups have deep cultural significance for the indigenous Sami people, representing their connection to nature and ancestral heritage. This cultural context adds a layer of meaning and symbolism not found in other types of cups.
- Maintenance: Kuksa cups require specific care, such as occasional oiling or seasoning, to maintain their longevity and keep them in good condition. Other cups, like stainless steel or plastic ones, may have simpler maintenance requirements.
While Kuksa cups offer many advantages, they may not be suitable for everyone or every situation.
Other types of cups might be preferred for certain purposes, such as formal events, where more elegant or delicate cups are desired.
Ultimately, the choice between a Kuksa cup and other cups depends on individual preferences, intended use, and appreciation for the cultural and environmental significance of the Kuksa.
6. How to make a Kuksa cup.
What is the best wood for a Kuksa cup?
The best wood for a Kuksa cup is typically birch burl (knotty growths on the trunk of a birch tree) or other types of hardwood.
Birch burl is highly regarded for its durability, workability, and attractive grain patterns, making it a popular choice among traditional Kuksa makers. Its tight grain structure and natural oils contribute to the cup's ability to withstand the rigors of outdoor use and the absorption of liquids.

While birch burl is commonly used, other hardwoods like Doussie, Walnut, Cherry, Oak, Ash, and Maple can also be suitable for crafting Kuksa cups. These woods offer their unique characteristics and aesthetic appeal, allowing artisans to create distinct and beautiful cups.
The selection of wood for a Kuksa cup depends on factors such as availability, the preferences of the craftsman, and the intended use of the cup. Regardless of the wood chosen, the key is to select a hardwood that is dense, non-toxic, and resistant to absorbing odors or flavors, ensuring a durable and hygienic vessel for drinking.
Making a Kuksa cup is a rewarding and intricate process that requires woodworking skills and patience.
Here is a general step-by-step guide on how to make a Kuksa cup:
Materials and tools needed:
- A piece of birch burl or hardwood (approximately 6-8 inches in diameter and 4-6 inches in height).
- Woodcarving tools (e.g., carving knife, hook knife, gouge).
- Sandpaper or sanding pads (various grits).
- Linseed oil or food-safe wood finish.
- Cloth or brush for applying the finish.
- Protective gear (e.g., gloves, eye protection).
- Workbench or a stable surface for carving.
How to make a Kuksa cup step by step.
Step 1: Prepare the Wood.

Select a suitable piece of birch burl or hardwood. Make sure the wood is dry and free from any rot or cracks. If necessary, cut the wood into a rough shape that resembles the general outline of a cup.
Step 2: Kuksa cup drawing with your size and design.

Depending on your needs, you can make any design with any size for your Kuksa cup, however you can refer to the size as shown below for the traditional Kuksa cup.
Step 3: Carve the Exterior.

Using a carving knife or hook knife, begin shaping the exterior of the Kuksa cup. Follow the natural contours of the wood and carve away excess material. Take your time to create a smooth and balanced shape.
Step 4: Hollow Out the Interior
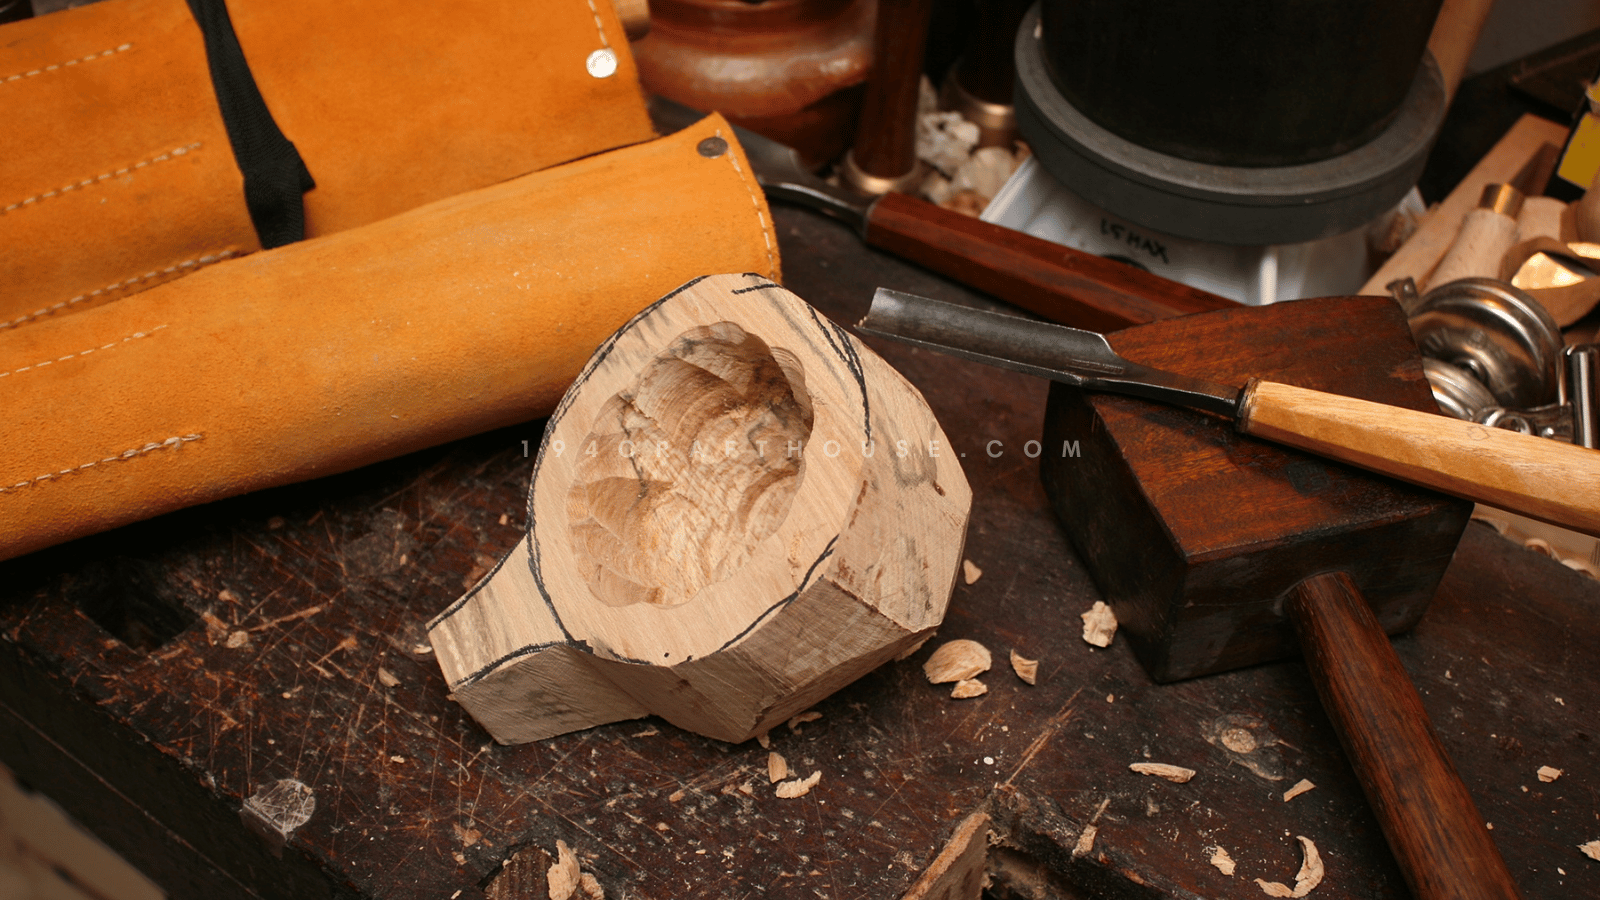
With a gouge or a curved knife, carefully hollow out the interior of the cup. Begin by removing small amounts of wood at a time, gradually deepening the hollow. Be cautious not to make the walls too thin to maintain the cup's strength.
Step 5: Refine the Shape.

Continuously assess the shape and thickness of the cup's walls. Refine the curves and contours until you achieve the desired form and thickness.
Step 6: Sanding.

Once the basic shape is complete, use sandpaper or sanding pads of different grits to smooth the exterior and interior surfaces of the Kuksa. Start with coarser grits and progressively move to finer ones to achieve a polished finish.
Step 7: Apply Finish.

To protect the wood and enhance its appearance, apply a food-safe wood finish like linseed oil. Allow the finish to dry according to the manufacturer's instructions. Apply multiple coats for better protection.
Step 8: Season the Kuksa.

Before using the Kuksa for beverages, season it by filling it with hot water and letting it sit for a few hours. This process helps the wood to expand and seal any small gaps or pores in the cup, making it more waterproof.
Step 9: Maintain the Kuksa

Regularly clean the Kuksa with warm water and mild soap. Avoid using a dishwasher or leaving it to soak. To maintain its longevity, periodically apply a thin coat of linseed oil or food-safe wood finish.
Keep in mind that carving a Kuksa cup requires skill and practice. If you're new to woodworking, consider seeking guidance from experienced artisans or attending workshops before attempting to make your own Kuksa. The process may take time and dedication, but the end result will be a unique and cherished cup with cultural and functional significance.
7. Kuksa cup care and maintenance
Is the Kuksa fragile? Can it break or crack?
The Kuksa being made of wood, it is less fragile than an ordinary porcelain cup for example. However it is not unbreakable! Indeed, if it falls from your height, it may crack or even break.
How to extend the life of your Kuksa?
You will find that some foods will stain your Kuksa, and I'm thinking particularly of red fruits like raspberries or blueberries!
But don't worry, we detail in this article how to remove this stain.

Treating the inside of the Kuksa
Why treat the inside of your Kuksa?
- To avoid cracks in the wood.
- To avoid having mold and mildew.
- To remove any staining of the wood by an ingredient.

The most natural and traditional way to treat the interior of your Kuksa is to use coffee grounds! Coffee grounds will make the cup waterproof and prevent it from cracking when it dries.
Treating the exterior of the Kuksa
Why treat the outside of your Kuksa?
- To give shine to the Kuksa.
- To protect it from cracks.
- To avoid any mold or mildew.
How to treat the outside of a Kuksa ?
The oil is perfect for treating the outside of your cup because it is hardening. Indeed, it solidifies in contact with oxygen. The drying time of the oil varies according to the temperature and humidity of the room, it can take a few days or a few weeks! But you can put it out to dry in the sun, so the drying of the Kuksa cup will be faster.
How do you care and maintenance for wooden Kuksa cups?
Proper care and maintenance are essential to ensure the longevity and beauty of a Kuksa cup.
Since Kuksa cups are made from natural wood, they require some special attention to keep them in good condition and preserve their functional and aesthetic qualities.
Here are some tips for caring for and maintaining your Kuksa cup:
- Handwashing Only: Avoid using a dishwasher or soaking the Kuksa cup in water. Instead, clean it by hand using warm water and mild soap. Rinse it thoroughly after washing and avoid leaving it submerged in water. Recommended Soaps: Ivory, Dawn, Mrs. Meyers, Seventh Generation, Dish-mate or ECover.
- Avoid Extreme Temperatures: Do not expose the Kuksa cup to extreme temperatures, such as boiling water or freezing temperatures. Sudden changes in temperature may cause the wood to crack or warp.
- Dry Thoroughly: After washing, dry the Kuksa cup with a clean cloth or allow it to air dry completely before storing. Moisture can lead to mold or mildew growth and may cause the cup to lose its shape over time.
- Re-Oil as Needed: To maintain the wood's natural luster and protect it from drying out, periodically apply a thin coat of food-safe wood oil, such as linseed oil. Follow the manufacturer's instructions for application. Recommended Food-Grade Oils: Mineral Oil, Beeswax, Coconut Oil (Refractionated) or Raw Linseed Oil.

- Avoid Harsh Chemicals: Refrain from using harsh chemicals or abrasive cleaners on the Kuksa cup, as they can damage the wood's surface and potentially leach into your beverages.
- Use Soft Beverages: While Kuksa cups are suitable for a variety of beverages, it is best to avoid acidic or highly alcoholic drinks, as they may affect the wood's taste and potentially damage the finish.
- Store Properly: Store the Kuksa cup in a dry and well-ventilated area away from direct sunlight and heat sources. Avoid stacking other items on top of the cup, as this can lead to deformation.
- Re-Season Periodically: Over time, the wood may naturally expand and contract. To maintain its water resistance, periodically re-season the Kuksa by filling it with hot water and letting it sit for a few hours. This process will help the wood reseal any small gaps or pores.
- Handle with Care: Although Kuksa cups are durable, they are not indestructible. Handle the cup with care to prevent accidental drops or impacts that could cause damage.
- Monitor for Wear: Regularly inspect your Kuksa cup for any signs of wear, such as cracks, splinters, or loose pieces. Address any issues promptly to prevent further damage.
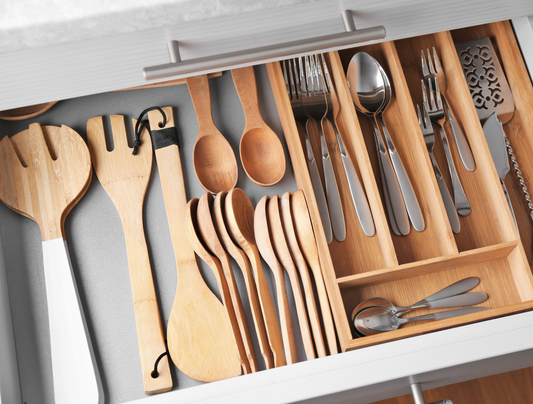
Related posts: Clean and Care for Wood Kitchen Utensils Properly
By following these care and maintenance tips, you can enjoy your Kuksa cup for years to come.
8. Kuksa cups as gifts.

Kuksa cups make wonderful and meaningful gifts for various occasions.
Whether you're looking to surprise a loved one or give a unique present to someone special, a Kuksa cup can be a thoughtful and cherished gift.
Here are some reasons why Kuksa cups are excellent gifts:
- Cultural significance: Kuksa cups have deep cultural significance, particularly for the indigenous Sami people of Northern Europe. Gifting a Kuksa cup can be a way to introduce the recipient to the rich heritage and traditions of the Sami people.
- Handcrafted beauty: Kuksa cups are handcrafted by skilled artisans, making each one unique and visually appealing. The craftsmanship and artistic value of the cup make it a special gift that stands out from mass-produced items.
- Functional and practical: Apart from their aesthetic appeal, Kuksa cups are highly functional as drinking vessels. They can be used to enjoy hot and cold beverages, making them useful in various settings, whether indoors or during outdoor adventures.
- Connection to nature: Gifting a Kuksa cup made from natural wood can help the recipient feel a closer connection to nature and appreciate the use of sustainable materials.
- Personalization: Many artisans offer the option to personalize Kuksa cups with engravings or custom designs. Adding the recipient's name or a meaningful message can make the gift more intimate and special.
- Suitable for various occasions: Kuksa cups are versatile gifts suitable for a range of occasions, such as birthdays, weddings, anniversaries, graduations, Father's Day, Mother's Day, or Christmas. They can also be given as thank-you gifts or tokens of appreciation.
- Outdoors enthusiasts: For individuals who love outdoor activities like hiking, camping, or bushcraft, a Kuksa cup can be a perfect gift. Its durability and practicality make it an essential item for outdoor adventures.
- Eco-friendly choice: As Kuksa cups are made from renewable and sustainable materials, they appeal to environmentally conscious individuals who appreciate eco-friendly gifts.
- Conversation starter: Gifting a Kuksa cup can spark conversations about the cultural significance of the cup and the traditions of the Sami people, providing an opportunity to learn and share stories.
- Memorable and lasting: A well-crafted Kuksa cup can become a cherished keepsake and remind the recipient of the thoughtful gesture and the special occasion when they received it.
When gifting a Kuksa cup, consider the recipient's interests, lifestyle, and appreciation for cultural heritage.
You can pair it with some specialty coffee or tea to complete the gift.

Ultimately, giving a Kuksa cup is more than just offering a drinking vessel; it's sharing a piece of tradition, craftsmanship, and cultural heritage that will be treasured for years to come.
9. How much is a Kuksa cup?
The price of a Kuksa cup can vary depending on several factors, including the quality of craftsmanship, the type of wood used, the design complexity, and the reputation of the artisan or seller. On average, a handcrafted Kuksa cup can cost anywhere from $30 to $100 or more.

Here are some general price ranges for Kuksa cups:
- Basic Kuksa: A simple, mass-produced Kuksa cup made from birch or other common woods may be on the lower end of the price range, typically costing around $30 to $50.

- Handcrafted Kuksa: Handcrafted Kuksa cups made by skilled artisans from high-quality materials, such as birch burl or rare hardwoods, are usually more expensive. These unique pieces of craftsmanship may cost between $50 to $100 or more, depending on the intricacy of the design and the rarity of the wood.
- Custom or Personalized Kuksa Cup: If you request custom engravings or personalized designs on the Kuksa cup, the price will likely be higher due to the additional work involved in creating a unique piece. Personalized Kuksa cups may range from $60 to $150 or higher.

- Antique or Collectible Kuksa: Rare and antique Kuksa cups, which may have historical significance or be of special cultural value, can be priced significantly higher. Collectors and enthusiasts might be willing to pay several hundred dollars or more for these unique and sought-after pieces.
It's important to note that the prices mentioned above are approximate and can vary based on the seller, location, and other market factors.
When purchasing a Kuksa cup, consider the quality of the craftsmanship, the authenticity of the materials used, and the reputation of the seller or artisan.
Handcrafted Kuksa cups, though more expensive, often offer greater artistic value and cultural significance, making them a worthwhile investment for those who appreciate the craft and heritage behind these traditional drinking vessels.
10. Where to find Kuksa Cup?
In the Scandinavian countries
The best place to find Kuksa and learn about their traditions is with the Sami themselves. The largest concentration of Sami is in Norway, but you can find them in Finland.
You can also find many Kuksa in various Finnish handicraft stores.

Buy Kuksa Cup online
Kuksa Shop offers you many cups handmade by a Finnish artisan. They are made of birch burr following the ancestral traditions.

- Handmade: Kuksa wooden cups are unique due to the nature of the wood being handcrafted by skilled craftsmen, you purchase to help crafters keep their job and continue creating more eco-friendly and sustainable craft art.
- Eco-friendly & Sustainable: All Kuksa cup-making of Doussie Wood, a high-quality wood used in kitchen utensils and allowed to use, safe for health and environmentally friendly and sustainable.
- Personalized: All you need to make your gift special is personalization and we can help you do that easily, the mug can be engraved with anything like name, text, icon or logo.
- Good price: For as little as $29.99, you can own a Handcrafted Wooden Kuksa Cup for yourself or as a gift for anyone.
- Gift wrap with handwritten message: Simply provide us with your message, and we will design and customize your message to make it memorable and impressive to the receiver. We choose kraft paper, an environmentally friendly material.
Read post: Gift wrapping and handwritten card customer service of 194 Craft House.
Above are 10 Things You Must Know About Handcrafted Wooden Kuksa Cup, so what else you need to know or know that the article is missing content, please comment, we will improve the article better.
If you think this article is useful, you can share it because it's free and that's the motivation to help us create more valuable content.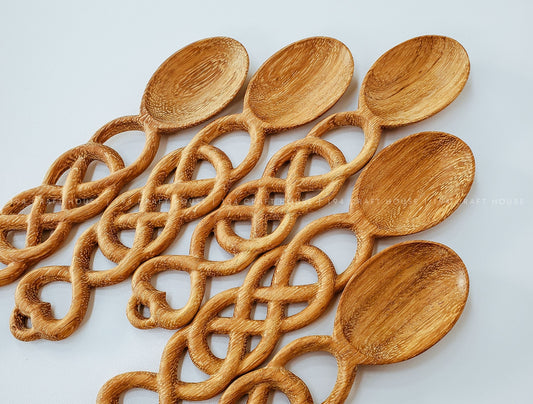

1 comment
Thank you for your help sharing, I bought Kuksa wooden cup from 194 Craft House and it is old after many uses, I have followed the How do you care and maintain for wooden Kuksa cups? to preserve the inside with coffee and preserve the outside with oil so it’s clean and like new. Thank you very much